Skip to content

Driveway Matting

$185.29


FREE SHIPPING
SKU ESS5.0450

Using our driveway matting will help you use up to 30% less rock for your base. It’s high strength and dimensionally stable woven fabric will reduce gravel migration and provide protection against rutting This will save you valuable time and money over the life of your driveway.

Our woven fabric is made from 100%  Polypropylene. It is made to resist ultraviolet light deterioration, and is inert to commonly encountered soil chemicals. The fabric will not rot or mildew, is non-biodegradable, and is resistant to damage from insects and rodents.

Our fabrics are available in a variety of widths and lengths the shortest roll being 27’ and the longest 432’ with widths that vary from 12.5’ to 17.5’ there is a roll size that will meet your project needs.

Stocked in 4 locations throughout the country for faster shipping.

Looking for landscape staples? Click here>

Staples are sold separately.

Product Info

  • Heavy-duty woven geotextile provides excellent base support for roadways, parking lots, paver patios and driveways
  • Reduces the amount of base materials required for the project
  • Excellent puncture and tear resistance
  • Mildew and rot Meets most DOT specs
  • Material: Polypropylene woven fabric

Downloads:

SHIPPING

✔  All items ship for free

☏  Call: (800) 583-4891 for pricing and shipping questions.

This material ships from either California, Minnesota, New Jersey or Georgia. Orders typically ship same day (if placed before 12 PM EST)

Note: The day that the order ships does not count as a transit day. We are unable to expedite fabric shipments faster than what is displayed on the map below.

Stabilization/Separation Fabric Instructions

1. Prepare Subgrade

Level, smooth out, and compact subgrade prior to installation.

2. Overlap Fabric

Place fabric on area smoothly and pull taut. Overlap 18- 24 inches, depending on subgrade. For best results, secure fabric with Fabric Staples by staggering 1.3 staples per square yard.

3. Add Base Material

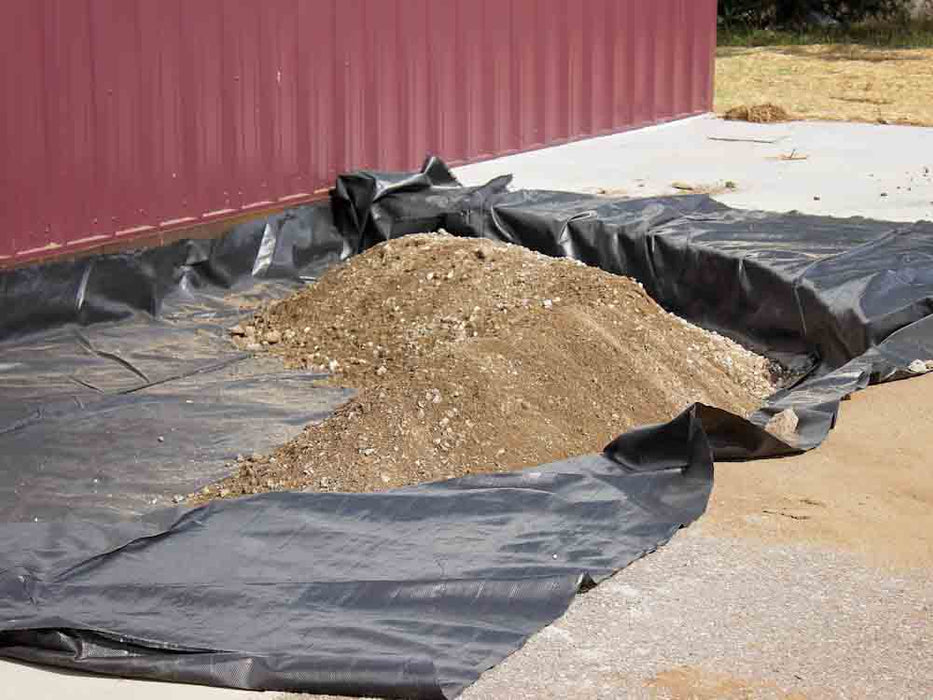
Carefully back dump base material onto fabric. Properly installed fabric can improve the long-term performance of your project 50-70%.

Fabric_Install5.jpg__PID:755788ca-82a9-45b6-aed7-7e2fb7a961de

Our Guide To Creating The Perfect Gravel Driveway

As you probably already know, a gravel driveway is economical and environmentally friendly compared to an asphalt driveway. A well-designed gravel driveway will not have unsightly ruts or damaged grass. A gravel driveway will also improve curb appeal and increase your property value. Our guide will give you all the information you need to create the perfect gravel driveway.

Gravel Road

Long Gravel Driveway

Planning

Once you have decided it's time to put in a gravel driveway, there are some things you need to take into consideration for building it.

The Location

First off, you need to decide where your gravel driveway should be or if you plan to use the area where your current driveway is located. Here are some recommendations to consider.

Waterflow

You should select an area that is not part of the property's watershed as water flowing across the driveway can lead to serious erosion.

Contact Your Utility Company First

You should call before digging to determine what utility lines might be running across your property. Call and schedule an appointment for your utility company to come out to your property and mark off where the lines run.

Outline Your New Driveway's Path

You can determine your new driveway's path using stakes, paint, or flags. This is an important step to determine how much gravel you will need for the project.

Calculate The Dimensions

Once you have staked out where the driveway will be, calculate the length, width, and depth of the driveway. The depth should be between 6 and 12 inches then multiply the depth by the length and width to get the cubic feet. Take that number and divide it by 27 to get the cubic yards. Give the measurements to your developer in cubic yards so they can calculate the tonnage of gravel you will need.

Rural Gravel Road

Country Gravel Road

Choose Your Gravel

Now it's time to decide the type of gravel you will need to complete the project. Usually, driveways have a larger base layer intermixed with finer grains of gravel. The driveway surface is a smaller top layer with a color that will reflect your desired aesthetic appeal.

Schedule The Delivery

The last phase in planning is to schedule delivery of the aggregate materials to complete your driveway. Point out the location on your property where the gravel will be spread. This should be located where you will be placing the gravel. Call your gravel provider and schedule the delivery.

Renting The Equipment

Contact your equipment rental company and schedule delivery of a skid steer. A skid steer is a compact heavy piece of equipment also known as a bobcat. Make sure it's scheduled after your gravel has been delivered. Make sure the skid steer has a front-end loader attachment. Also, if available, you should include a box grader attachment. This attachment will help to level out the road.

Driveway gravel road

Gravel Driveway

Preparing The Site

With all steps in place, you can start preparing the site for your gravel driveway.

You can use a rented skid steer or use shovels and start removing topsoil along the path of your driveway. You should have this path 6 to 12 inches in depth.

You can use this soil to level areas of your property or fill in depressions or ruts. If this requires a backhoe or a bulldozer, you will have to contract out this step to get the job done.

Level The Ground

After you have removed the topsoil, in order to level out the soil, use the grader or rakes and shovels along your driveway. An uneven surface will lead to your driveway deteriorating much faster. You can use rakes and shovels to clean up the edges of your driveway pathway.

Apply the Driveway Matting

The last task for preparation, add a layer of driveway matting. This will help to keep the gravel from mixing with the ground below and will also help to reduce ruts. Additionally, the matting will reduce the amount of grasses, weeds, and larger plants from attempting to grow in the middle of your driveway.

The Gravel

Once the site preparation is done, you can start putting down your first layer of gravel.

Add A Base Layer

For smaller projects, you can use a shovel and wheelbarrow to place down a base layer of rocks on top of your landscaping fabric. For larger projects, like the driveway, you should use a front-end loader on your skid steer to place it along the path of your driveway. The base layer should consist of larger 2 to 3-inch gravel.

Level And Compact The Ground

To level out the base layer, use the box grader or a shovel and rake as best as you can. It is highly recommended you use a compactor or heavy vehicle to compress each layer of crushed rock applied to the driveway.

Add Your Top Layer

Once the base layer is level, add a top layer of stone. The stone should be 1/2 inch or 2 inches and in a color that reflects your aesthetic needs. When leveling or grading the top layer of stone, it's common practice to have a high center or crown to prevent the loss of gravel loss or potholes from forming. It's recommended that a 4% grade be used when crowning your driveway.

Large Gravel Driveway

Driveway Matting Under Gravel